
The Ultimate Guide to Photographing the Milky Way
Bob Conn
7/20/20258 min read
Introduction to Milky Way Photography
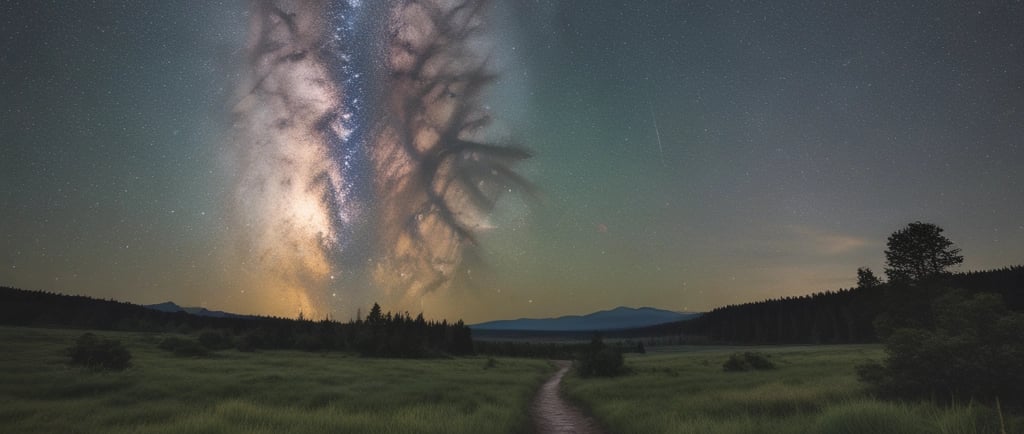
The Milky Way, a mesmerizing spiral galaxy that encompasses our solar system, is a subject of intrigue for both amateur and professional photographers. Comprised of billions of stars, along with nebulae and dark matter, it casts a breathtaking glow across the night sky. As a result, Milky Way photography has gained significant popularity among enthusiasts who seek to capture the ethereal beauty of our galaxy.
One of the primary reasons for the allure of Milky Way photography is its ability to evoke a sense of wonder and connection with the universe. Capturing the galaxy's intricate details against a backdrop of dark, star-studded skies allows photographers to document not only the stunning visuals but also the overwhelming scale of the cosmos. Each photograph serves as a bridge that connects viewers to the vastness of space, offering a glimpse into a dimension far beyond our daily lives.
However, photographing the Milky Way is not without its challenges. It requires a keen understanding of various photographic techniques and conditions, including the importance of light pollution, weather, and timing. A successful shot of the Milky Way often involves careful planning, such as selecting a suitable location with minimal light interference and awareness of the Moon's phases, which can affect visibility. Moreover, mastering camera settings such as exposure time, aperture, and ISO is crucial to ensnare the galaxy's radiant colors and textures without losing detail.
The excitement of capturing celestial landscapes is undeniable. For many photographers, the thrill of witnessing the Milky Way emerge into full view, coupled with the serenity of nighttime wilderness, creates an unforgettable experience. This guide aims to provide insights and tips to navigate the unique challenges one may encounter in Milky Way photography, thereby enhancing the journey toward capturing the galaxy in all its glory.
The Best Times of Year to Capture the Milky Way in the Northern Hemisphere
Photographing the Milky Way in the Northern Hemisphere requires careful planning to ensure optimal conditions for capturing stunning images of this celestial wonder. The best times to display the Milky Way vary throughout the year, with key considerations including seasonal visibility, moon phases, and prevailing weather conditions.
From late spring to early fall—specifically May through September—photographers can enjoy the most favorable conditions for capturing the Milky Way. During these months, the galactic core is prominently visible in the night sky, providing an exquisite opportunity for stunning astrological photography. As spring transitions into summer, the skies grow darker later in the evening, which allows for extended periods of Milky Way visibility.
It is also critical to consider the moon phase when planning your photography sessions. The ideal time to capture the Milky Way is during the new moon phase when the absence of moonlight minimizes light pollution, enhancing the brilliance of the stars. Conversely, photographing during a full moon can hinder visibility of the Milky Way, making it essential to check lunar calendars before heading out on your photography expeditions.
Additionally, weather conditions significantly impact the potential for quality photographs. Clear, cloudless nights are preferable, as overcast skies can obscure the view of the Milky Way. Monitoring weather forecasts will help photographers determine the best dates to venture into areas with minimal atmospheric interference.
Moreover, light pollution can diminish the beauty of the Milky Way. It is advisable to seek remote locations, away from artificial light sources, to maximize composition quality. Darker areas not only provide clearer visibility but also result in remarkably vivid captures of the Milky Way.
Essential Equipment for Milky Way Photography
Photographing the Milky Way requires specific equipment to ensure optimal results, given the challenges posed by low-light conditions and the vastness of the night sky. The foundation of your setup begins with a capable camera. A DSLR or mirrorless camera with manual settings is ideal, as it allows for adjustments in exposure, ISO, and aperture, which are crucial for capturing the faint light of the stars. Cameras with larger sensors, such as full-frame models, tend to perform better in low-light environments, providing greater detail and less noise.
Following the camera, lens selection plays a critical role in Milky Way photography. Wide-angle lenses, typically ranging from 14mm to 24mm, are recommended, as they capture more of the sky in a single frame. A lens with a wide maximum aperture, such as f/2.8 or wider, is essential to allow as much light as possible to enter, thus helping to illuminate the details of the Milky Way. Lenses that support astrophotography by minimizing distortion are particularly advantageous for achieving crystal-clear images.
Equally important is a sturdy tripod. Given the long exposure times necessary for capturing the Milky Way, a stable tripod prevents camera shake that could lead to blurry images. Look for tripods made of durable materials that can withstand outdoor conditions. Additionally, consider using a remote shutter release or the camera's timer function to further reduce any potential vibrations during the shooting process.
In addition to these primary tools, a flashlight or headlamp is recommended for navigating dark environments without disturbing your night vision. Some photographers find it helpful to use star trackers or tracking mounts to reduce star trails during prolonged exposures. Each piece of equipment contributes to your ability to capture stunning images of the Milky Way, enhancing both the creativity and technical aspects of your astrophotography endeavors.
Camera Settings for Starry Night Photography
Obtaining stunning photographs of the Milky Way necessitates a firm understanding of camera settings appropriate for starry night photography. One of the primary settings to consider is exposure time, which is crucial for capturing the intricate details of the galaxy. Ideally, a shutter speed ranging from 15 to 30 seconds is recommended. Longer exposures can lead to star trails, whereas shorter ones may render the stars as mere dots. The precise exposure duration can vary depending on the focal length of your lens and the specific night conditions.
Next, the ISO setting plays a pivotal role in how your camera captures light. A higher ISO, typically between 1600 and 3200, will allow the camera to be more sensitive to light, enabling you to capture fainter stars and details of the Milky Way. However, it is essential to be mindful of noise that can accompany elevated ISO levels; therefore, testing various settings to find an optimal balance is advisable.
Aperture is another fundamental setting to adjust while photographing the Milky Way. A wide aperture, such as f/2.8 or lower, allows a greater amount of light to reach the sensor, which is vital for night photography. While lenses with wider apertures are often preferred, one can also achieve satisfactory results with slower lenses by increasing the ISO or exposure time, making it essential to experiment when shooting.
Finally, understanding your camera type is crucial. Different cameras, whether DSLR, mirrorless, or smartphone, may require tailored settings. For instance, smartphones may have dedicated night modes that automatically adjust various parameters, significantly easing the shooting process. For DSLR and mirrorless cameras, manual settings are paramount for optimal results. Familiarity with these camera settings and the willingness to experiment will culminate in captivating images of the Milky Way.
Using Photo Apps for Planning Milky Way Shots
In the realm of astrophotography, mobile photography applications have become essential tools for enthusiasts looking to capture the beauty of the Milky Way. Among the most notable applications available today, PhotoPills stands out for its comprehensive features, which are designed to assist photographers in planning and executing their Milky Way shots more effectively.
One of the primary functionalities of PhotoPills is its ability to track star locations. With an intuitive interface, users can input their geographic location and select specific dates and times. The app then calculates the position of the Milky Way and other celestial bodies in the sky, allowing photographers to plan their shots with precision. This level of planning is crucial, as different seasons and times of day will affect the visibility of the Milky Way during a shoot.
Additionally, PhotoPills offers time-lapse calculation features. This is particularly useful for photographers looking to create dynamic sequences of the night sky. By allowing users to input their desired time frame and settings, the app can automatically calculate the necessary intervals for capturing each shot, making the process of capturing stunning time-lapse videos more manageable and less reliant on guesswork.
Understanding light conditions is another critical aspect of planning Milky Way photography, and PhotoPills excels in this area as well. The app provides users with data on moon phases, sunrises, sunsets, and civil twilight, which are all pivotal in determining the optimal time for capturing the Milky Way without interference from artificial light or the moon's brightness. By utilizing these features, photographers can enhance their ability to capture impressive images of the night sky.
In summary, the integration of mobile photography applications like PhotoPills into the planning process for Milky Way shots can significantly increase the likelihood of capturing exceptional images. By taking advantage of the app's features for star location tracking, time-lapse calculations, and light condition analysis, photographers can elevate their astrophotography endeavors to new heights.
Post-Processing Techniques for Milky Way Images
Post-processing is a crucial phase in photographing the Milky Way, where the captured images are transformed into compelling works of art. Several software options are available for photographers, ranging from basic applications like Adobe Lightroom to more advanced tools such as Adobe Photoshop and specialized astrophotography software like Starry Landscape Stacker. Each of these programs offers unique functionalities that can help elevate your Milky Way images.
To start the post-processing process, it is advisable to first adjust the basic settings such as exposure, contrast, and white balance. Increasing contrast can significantly enhance the distinctiveness of the Milky Way's features against the night sky. Consequently, this adjustment will help in making the stars pop and bring out the intricate details of the galaxy. Color correction is also vital; adjusting the temperature to a cooler tone often deepens the richness of the blues and purples typical in a night sky scene.
Another essential step is noise reduction. Since images captured in low-light conditions can often exhibit unwanted noise, utilizing noise reduction tools within your editing software can minimize this issue without compromising detail. A delicate balance is necessary here, as over-application can lead to loss of critical elements within the image. Additionally, advanced techniques such as stacking images can provide another layer of quality enhancement. By combining multiple images of the same scene, photographers can improve clarity while simultaneously reducing noise, resulting in a sharper and higher-quality final image.
Through thoughtful post-processing techniques, photographers can breathe life into their raw Milky Way captures, fine-tuning each aspect to produce stunning and impactful imagery that captivates viewers. Embracing both basic and advanced techniques will ultimately enable one to achieve desired results while maintaining the integrity of the original capture.
Tips for Successful Milky Way Photography
Capturing the ethereal beauty of the Milky Way requires both preparation and understanding of various factors influencing night photography. One of the first steps in successful Milky Way photography is selecting an optimal location. Look for areas with minimal light pollution, such as national parks or remote countryside locations. Utilizing online maps designed to track light pollution can help you identify ideal spots that allow for clearer starry skies.
Understanding light pollution is crucial. Even small amounts of artificial light can significantly impact your images, washing out the delicate details of the Milky Way. Always plan your shooting sessions around the new moon phases, as this provides the darkest skies and the most visibility of celestial bodies. Additionally, check the weather forecast to ensure clear skies, as cloud cover can hinder visibility and ruin potential shots.
Patience is an essential trait for aspiring astrophotographers. While it may take several attempts to capture the perfect image, each outing offers invaluable learning experiences. Take the time to experiment with different camera settings, compositions, and techniques. Consider wide-angle lenses with fast apertures (like f/2.8 or faster) for capturing more light, allowing for more detailed photographs of the Milky Way.
Engaging with local photography communities can also be beneficial. Many seasoned photographers are willing to share their insights, tips, and experiences with newcomers. Online forums and social media groups dedicated to astrophotography can provide constructive feedback on your work, helping you refine your skills over time.
As you embark on your journey of Milky Way photography, remember that persistence and continual practice are key. Each photograph captured adds to your growing understanding of the cosmos and the art of photography.
#LearnPhotography, #PhotographyTips, #MasterYourCamera, #MilkyWayPhotography